Migrating a website from one account to another using WHM and cPanel
Migrating a website from one account to another using WHM and cPanel
May 25, 2023

Step 1: Access WHM on the Source Server
- Log in to WHM on the source server where the website is currently hosted.
- Locate the Account:
- Navigate to List Accounts or use the search bar in WHM to find the cPanel account you want to transfer.
- Note the domain name, username, and any other details for reference.
Step 2: Backup the cPanel Account
- Log in to WHM on the source server where the website is currently hosted.
- Locate the Account:
- Navigate to List Accounts or use the search bar in WHM to find the cPanel account you want to transfer.
- Note the domain name, username, and any other details for reference.
Step 3: Access WHM on the Destination Server
- Log in to WHM on the destination server or hosting account where you want to migrate the website.

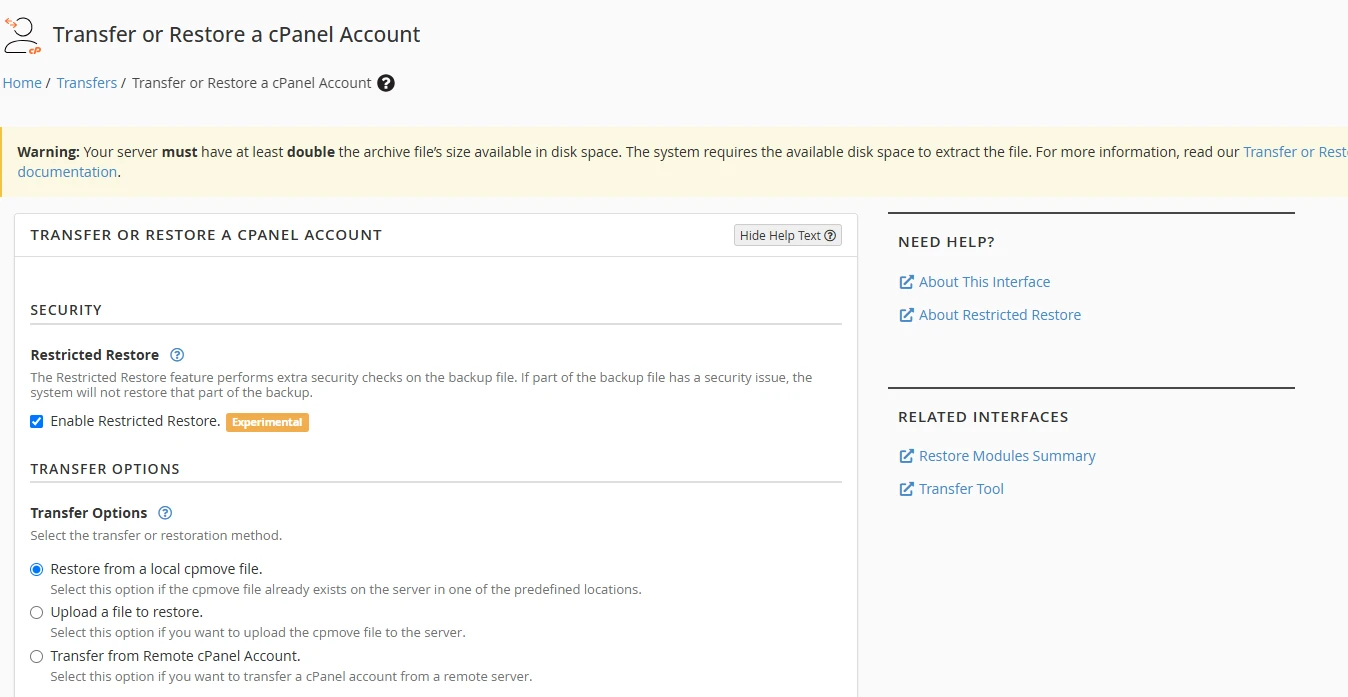
You can transfer a full cPanel account using the transfer tool.
Step 4: Use the “Transfer Tool” (Preferred Method)
- In WHM, search for and open Transfer Tool.
- Enter the IP address or hostname of the source server.
- Provide the root username and password for the source server.
- WHM will verify the connection and list all accounts available for transfer.
- Select the account(s) you want to transfer.
- Transfer Settings:
- Ensure options such as retaining account ownership and overwriting existing accounts (if needed) are set correctly.
- Start the transfer and monitor the process until it completes.
Step 5: Manually Upload the Backup (If Not Using Transfer Tool)
- Download the Backup:
- If a full backup was generated in cPanel earlier, download it to your computer or directly to the destination server via SSH.
- Upload the Backup:
- Log in to the destination server’s WHM.
- Go to Restore a Full Backup/cpmove File.
- Upload the backup file or place it in the
/homedirectory via FTP or SSH. - Use the Restore feature in WHM to restore the account.
Step 6: Update DNS Settings
Update the DNS settings to point to the destination server.
- Modify the A record or name server settings for the domain at the registrar level.
- Ensure the DNS propagates correctly (this may take up to 48 hours).
Step 7: Test the Website
- Access the website using its domain name or a temporary URL (if the domain DNS is still propagating).
- Test all functionalities to ensure that the migration was successful.
Troubleshooting Tips
- Database Connection Errors: Check the
wp-config.php(for WordPress) or similar configuration files to ensure the database details are correct. - Email Accounts: Migrate email accounts and settings manually if required.
- SSL Certificates: Reissue or reinstall SSL certificates for the migrated domain if needed.


Vestibulum turpis sem, aliquet eget, lobortis pellentesque, rutrum eu, nisl. Cum sociis natoque penatibus et magnis dis parturient montes, nascetur ridiculus mus. Nunc sed turpis. Vestibulum eu odio.